Changing Road Speed With Paccar Davie 4 Fleet Software
When your local dealer set you up with the Davie 4 license, they would have provided a username and password. These are extremely important as they are required for doing road speed changes. Make sure you have this information written down or saved somewhere for easy access.
To get started Paccar requires that you visit: https://eportal.paccar.net
Once there, enter your username and password and login.
Now that you’re all logged in to their system you’ll want to click on the “Service” tab in the middle of the top bar on your screen then find the “Software” tab in the left-hand column. Last but not least, click on “Paccar Vehicle Pro” or “PVP”.
Once you are in the Paccar Vehicle Pro section you will need to enter the last 8 digits of your vehicle’s VIN in the search box and click “Go”. After you do that it will bring up all of the parameters for your engine. Now you can now view and edit all of the engine’s settings.
Make your selected changes in the boxes and click “Save” and continue. Once your changes have been verified, then click “Submit”. PVP will show a popup showing that changes were successful and that files are ready for download with Davie 4.
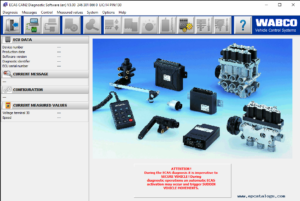
Connect Davie 4 to the truck and click on “Identify“. Once the Quick check is finished. Go to the “Software” tab. Highlight the “PCI” and “EAS” tabs within Software and click “Retrieve” in the bottom right. Once the files are downloaded, they will show an expiration date. When ready highlight “PCI” and click update. From there follow the prompts through the cycle and update both the PCI and EAS.
Once the flash is completed the changes are installed in the ECM.
If you see a screen that looks like this, that means it was successful.

Summary
Here is the summarized step-by-step guide:
- Visit https://eportal.paccar.net and login with your EPORTAL ID.
- Click on the “Service” tab on the top of the screen.
- Click on “Software” in the left hand column.
- Now click on “Paccar Vehicle Pro“
- Enter the last 8 digits of your VIN.
- Make the desired changes and click “Save“
- Connect to the truck and open Davie 4.
- Go to the “Software” tab and highlight PCI and EAS and click retrieve.
- Once the files are retrieved you can download and update them.
- This may take several minutes.
(Make sure you don’t get disconnected while performing the updates, this could cause major damage to the ECM)