Today we will take a look at the fault code troubleshooting capability of Jaltest’s Commercial Vehicle software. The first thing on our to-do list is connecting up to a vehicle.
1. Plug your Jaltest Link interface into your laptop and open up the Jaltest program.
Use the USB cable to plug the Jaltest Link adapter into your laptop, then double click the Jaltest icon to get started. Once you see this screen you’re ready to connect up to a vehicle.
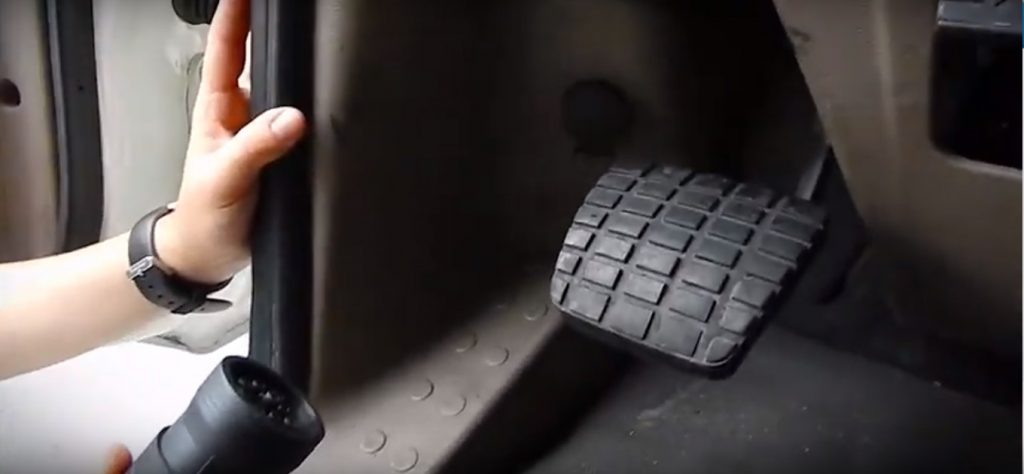
2. Find the Appropriate Cable and Connect Up to Your Vehicle
Now you want to figure out which cable you will need in order to connect to the vehicle. In our example we’re using a 9 pin. Go ahead and plug in to the vehicle and you’re ready to move on to the next step.
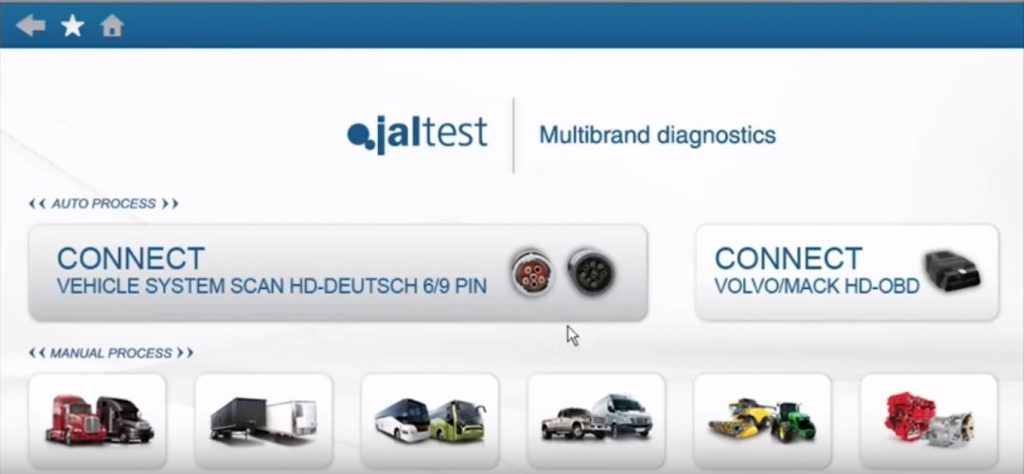
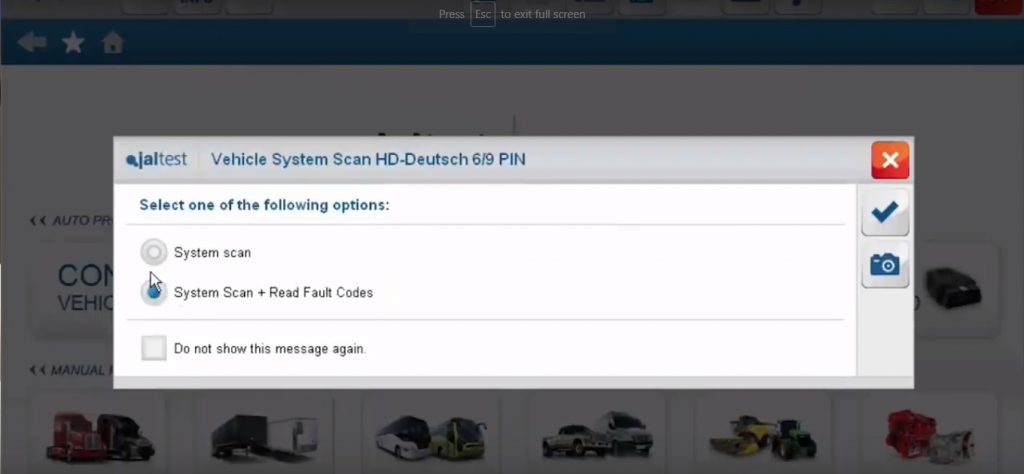
3. Click “Connect” and Then Select “System Scan + Read Fault Codes”
Once you’re plugged in to the truck click “Connect”. A new window will pop up and ask if you want to do a system scan, or a system scan and read fault codes. To be safe, we almost always choose the second option: “System Scan + Read Fault Codes”.
4. Let It Read The Vehicle Systems
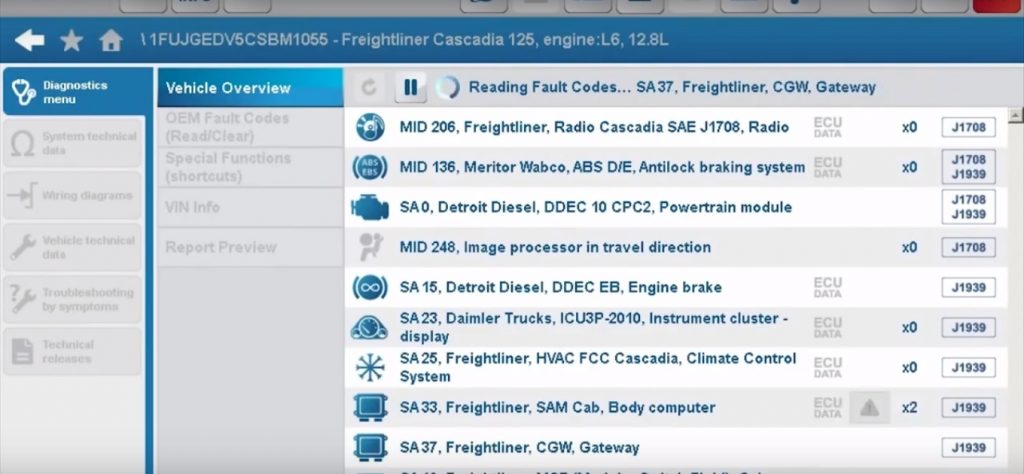
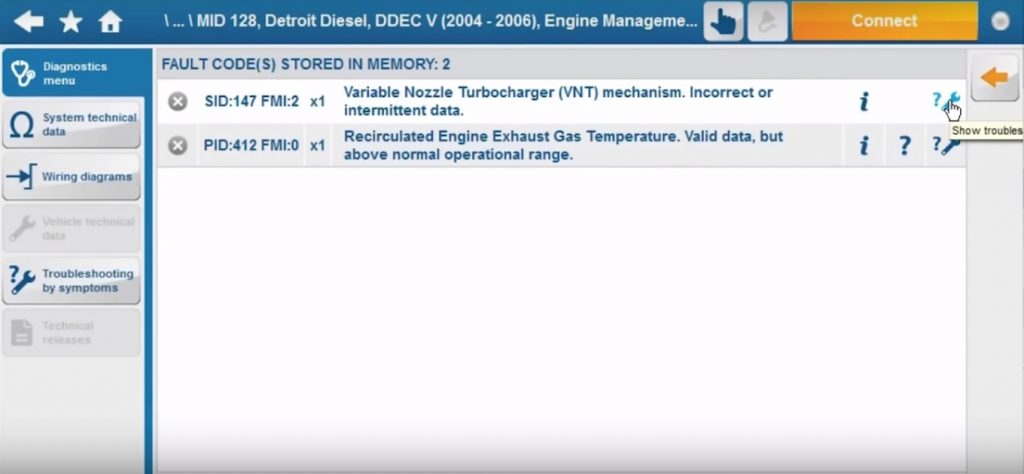
4. Click On The Caution Icons to View Fault Codes
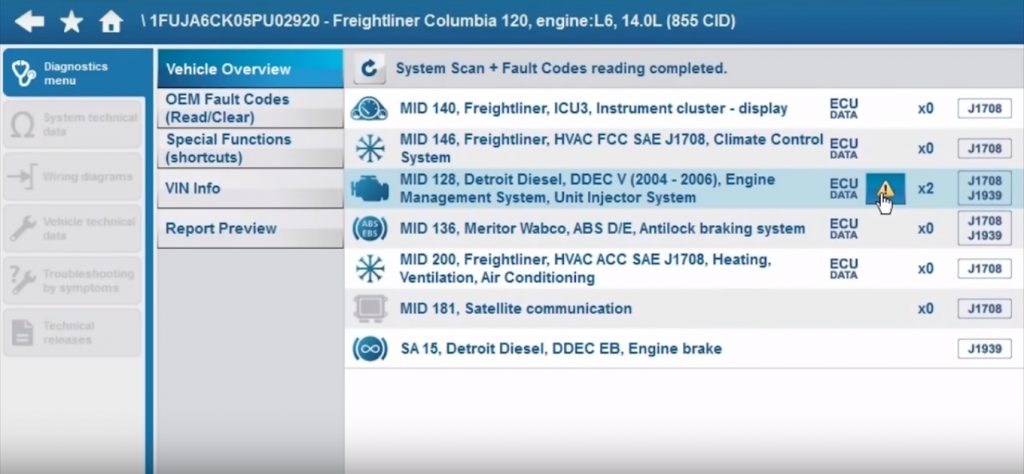
After the scan is completed yellow caution icons will show up if there are any fault codes in that system. To view more information about the fault click on that icon.
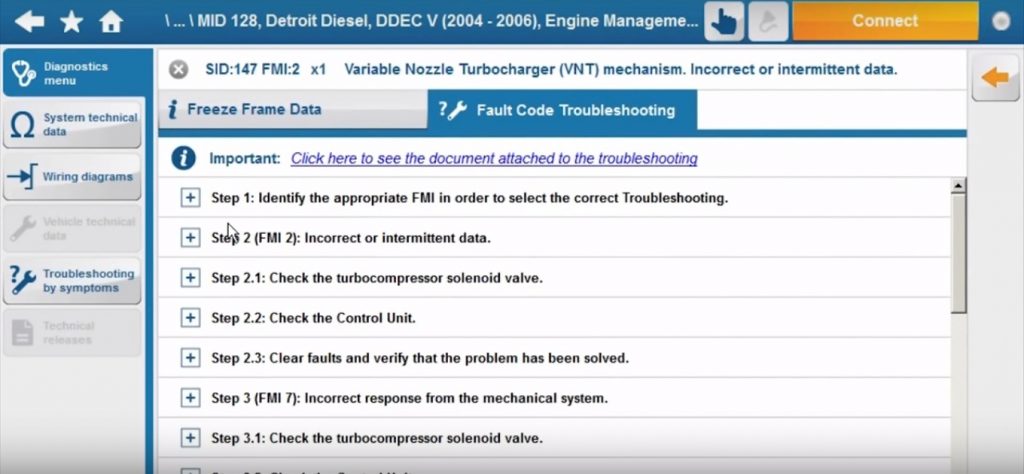
5. Click On The Question Mark/Wrench Icon to View Troubleshooting Information
To get a full step-by-step breakdown of the specific fault code click on the question mark/wrench icon. This will provide an in-depth breakdown of the fault, what is causing it, and the steps that need to be taken in order to fix it.