Adding a new ECM connection in Cummins Insite is a really simple and straightforward process.
Getting Started
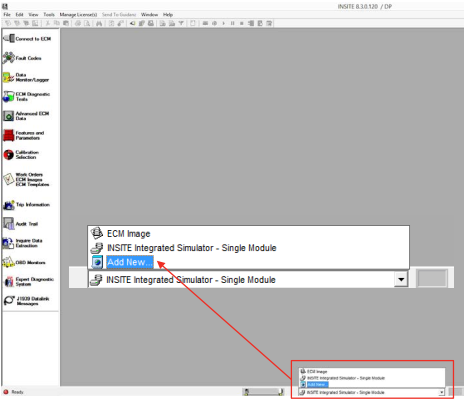
- Click on connection
- Select “Add New…”
- A dialog box for the ECM Connection Wizard should pop up
- Click “Next to continue.
Adding a New Connection
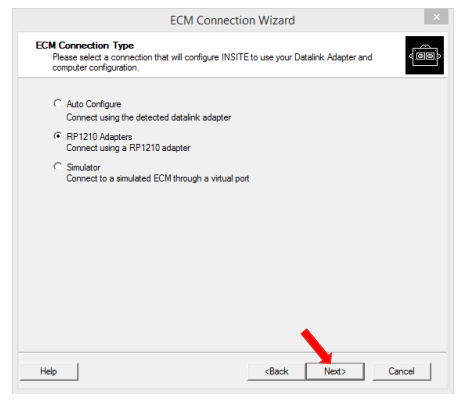
- Select appropriate connection: Auto Configure, RP1210, or Simulator
- Click “Next” to continue
Auto Configure
- Auto Configure will automatically detect and connect to an RP1210A compliant adapter that is installed on your PC.
- Select Auto Configure and click the Next button.
- Ensure that the steps listed in the instructions have been completed.
(see picture below) - Click the Start button
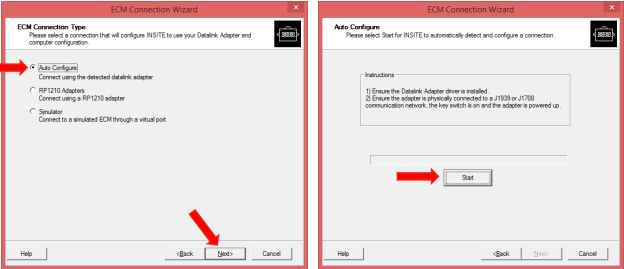
- Auto Configure will attempt to detect and connect to an RP1210A compliant adapter.
- Depending on a number of factors, this could take several minutes.
- To cancel the process, click the Stop button, otherwise let it run until it completes.
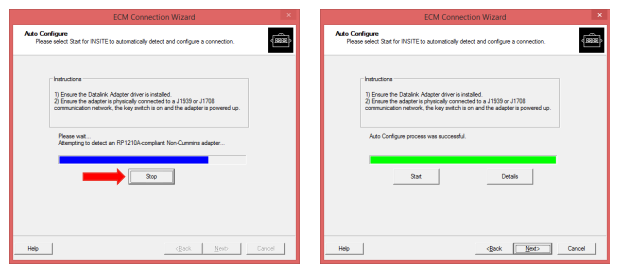
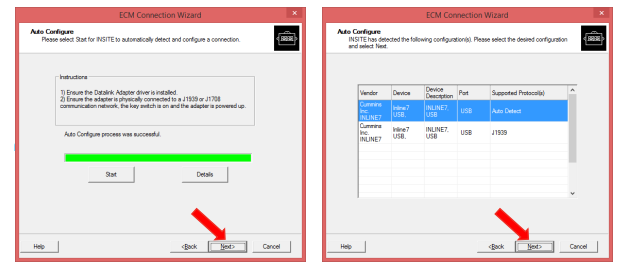
- Auto Configure process was successful.
- Click on the Next button to continue.
- Select the desired adapter configuration.
- Click on the next button to continue.
RP1210A Adapters
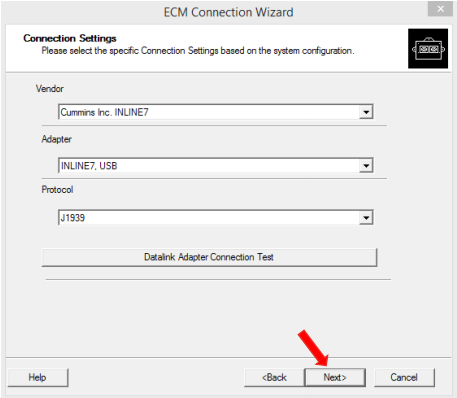
- Select desired vendor
- Select desired adapter
- Ensure correct connection type is selected (such as USB, Bluetooth, Wireless, or COM port
- Select protocol (Auto Detect, J1939 or J1708)
- If desired, you may click “Datalink Adapter Connection Test” to validate driver installation.
- Once successful, click on “Next” to continue.
Simulator
- Simulates connections to all supported engines
- Classic simulator options available for pre-EPA 2007 engines.
- Integrated simulator options available for EPA 2007 and newer engines.
Adding a New Connection
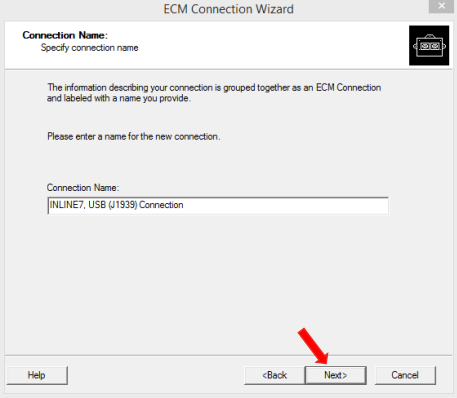
- Enter a desired name for the connection
- Click “Next” to continue.
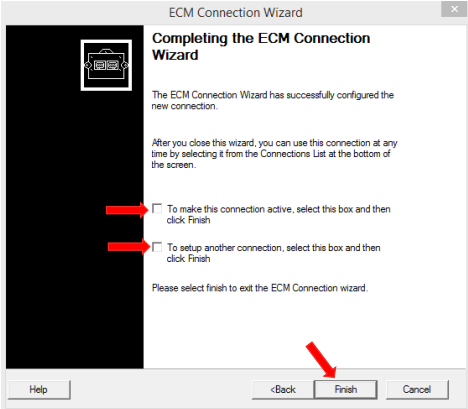
- If desired, select corresponding checkbox to make connection active.
- If desired, select corresponding checkbox to setup/add another connection.
- Click “Finish”
NOTE: If another connection is not being created and connection is made active, the Connect to ECM dialog box will appear after it finishes.
Additional connections or simulators can be added by navigating to:
Menu Bar -> Tools -> Options -> Connections
File -> Connections -> Add New Connection
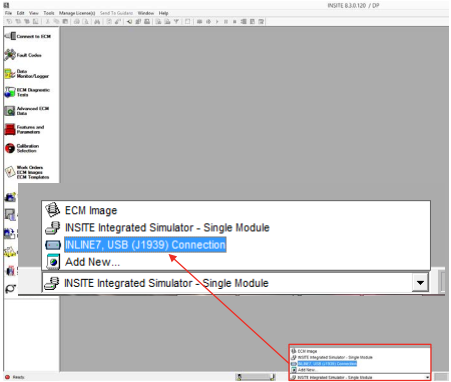
Selecting Connections
- Select connection from dropdown.
- Connect dialog box should appear after selecting desired connection.
Connecting to ECM
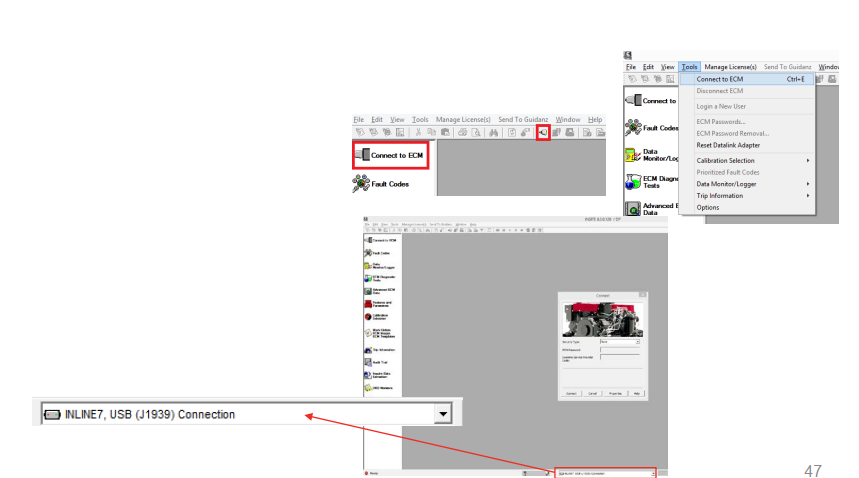
- Use the left View Bar “Connect to ECM” icon.
- Click on Tool Bar icon
- From Menu Bar, click on Tools -> Connect to ECM
- Use keyboard key shortcut CTRL+E
IMPORTANT NOTE: Always ensure the desired adapter is selected before attempting to connect to the ECM.